The Honeywell Pro 5000 is a non-programmable digital thermostat designed for simplicity and energy efficiency․ It offers straightforward installation and intuitive controls for optimal HVAC system management․
The thermostat features a user-friendly interface and compatibility with various heating and cooling systems, making it a reliable choice for homeowners seeking precise temperature control․
This guide provides a comprehensive overview of the installation process, ensuring a seamless setup experience․
1․1 Overview of the Honeywell Pro 5000 Thermostat
The Honeywell Pro 5000 is a non-programmable digital thermostat designed for ease of use and energy efficiency․ It features a straightforward interface, precise temperature control, and compatibility with most HVAC systems․
The thermostat is ideal for homeowners seeking a reliable, user-friendly solution to manage their heating and cooling needs effectively․ Its design emphasizes simplicity and performance, making it a popular choice for seamless climate control․
1․2 Importance of Proper Installation
Proper installation of the Honeywell Pro 5000 thermostat is crucial for optimal performance and safety․
Incorrect wiring or setup can lead to system malfunctions, energy inefficiency, or even damage to the HVAC system․
Following the manual ensures correct configuration, avoiding potential issues and guaranteeing reliable operation․
A well-installed thermostat maximizes energy savings and extends equipment lifespan, making adherence to guidelines essential․
System Requirements and Compatibility
The Honeywell Pro 5000 thermostat is compatible with single-stage heating and cooling systems, including gas, oil, electric, and heat pumps․ Ensure your HVAC system matches these requirements for proper functionality․
2․1 Compatible HVAC Systems
The Honeywell Pro 5000 thermostat is designed to work with single-stage heating and cooling systems, including gas furnaces, heat pumps, and electric systems․ It is compatible with 24V HVAC systems and can be integrated with zoning panels for multi-zone control․ Ensure your system matches these specifications for optimal performance and proper installation․
2․2 Necessary Tools and Materials
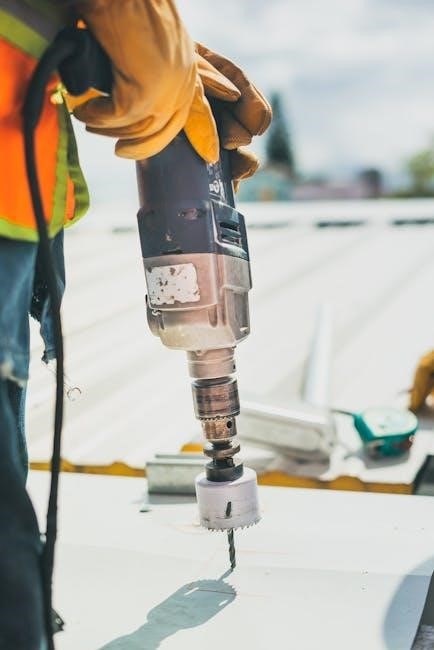
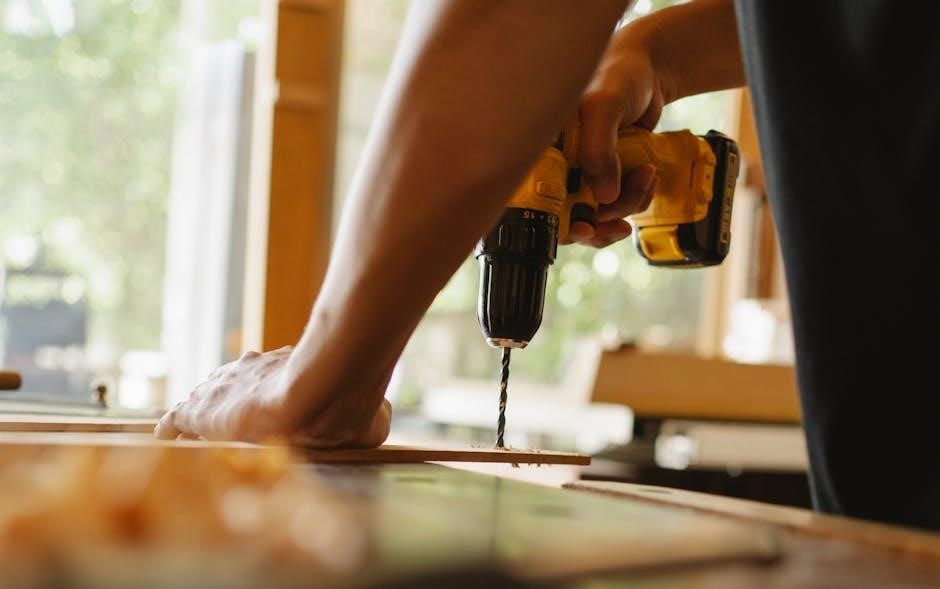
For installing the Honeywell Pro 5000 thermostat, you will need a screwdriver, wire strippers, and a voltage tester․ Ensure you have the correct mounting hardware, such as screws and anchors, to secure the wall plate․ Additionally, a drill may be required for making holes in the wall․ Always refer to the manual for specific tools recommended for your system type․
2․3 Electrical Requirements
The Honeywell Pro 5000 requires a 24V AC power supply․ Ensure the system is compatible with standard HVAC voltages (R, C, and W terminals)․ Verify the wiring matches the terminal designations in the manual․ Always shut off power at the circuit breaker before starting installation to avoid electrical hazards․ Refer to the manual for specific voltage and wiring requirements for your system type․

Pre-Installation Steps
Before installing the Honeywell Pro 5000, ensure the site is prepared․ Shut off power to the HVAC system and remove the old thermostat․ Clean the area and verify all tools and materials are ready for a smooth installation process․ Follow safety guidelines to avoid electrical hazards․ Proceed with caution and precision․
3․1 Preparing the Installation Site
Ensure the installation area is clean, dry, and free from debris․ Inspect the wall for damage or unevenness and repair if necessary․ Verify the thermostat location allows proper airflow and accessibility․ Maintain a minimum clearance of 12 inches from any obstructions․ Gather all tools and materials, and ensure the power to the HVAC system is turned off before proceeding․ Safety first!
3․2 Shutting Off Power to the HVAC System
Before starting the installation, ensure all power to the HVAC system is turned off at the circuit breaker or main electrical panel․ Verify the power is off using a voltage tester․ This crucial step prevents electrical shocks and ensures a safe working environment․ Always prioritize safety when handling electrical systems․
3․3 Removing the Old Thermostat
Disconnect the wires from the old thermostat and carefully pull the unit away from the wall․ Remove any screws or clips securing the thermostat in place․ Handle the old thermostat with care to avoid damaging the wiring or surrounding area․ Once removed, set it aside and label the wires for reference during the new installation․
Mounting the Thermostat
Attach the Honeywell Pro 5000 thermostat to the wall using the provided screws․ Ensure the wall plate is level and secure for proper installation․ Use a level tool to confirm alignment․
4․1 Attaching the Wall Plate
To attach the wall plate, remove any protective covering and align it with the mounting screws․ Gently press the plate until it clicks securely into place․ Ensure it is flush against the wall for a professional finish․ This step ensures stability for the thermostat’s proper function and appearance․ Always follow the manual’s guidelines for correct installation․
4․2 Handling the Wiring
Identify the terminal designations on the wall plate and match them to your HVAC system’s wires․ Connect each wire carefully to the corresponding terminal, ensuring secure tightening․ Refer to the manual for specific terminal labels and wiring configurations․ Avoid over-tightening, which could damage the terminals․ If unsure, consult a licensed electrician to prevent system malfunctions or safety hazards․
4․3 Adjusting the Thermostat Level
Ensure the thermostat is level during installation for accurate temperature readings․ Use a spirit level to verify proper alignment․ Gently adjust the wall plate or thermostat as needed․ A misaligned thermostat can lead to incorrect temperature sensing, affecting system performance․ Secure the thermostat firmly to the wall to maintain its level position and ensure reliable operation․
Wiring and Connections
Connect wires to the appropriate terminals on the Honeywell Pro 5000 thermostat, ensuring safe and secure connections․ Always turn off power before handling wiring to avoid hazards․ Use the terminal designations guide to match wires correctly and verify all connections are tight and properly insulated to prevent electrical issues․
5․1 Connecting the Wires to the Thermostat
Connect the wires to the Honeywell Pro 5000 thermostat by matching each wire to the correct terminal, as indicated in the manual․ Ensure the wires are securely attached to avoid loose connections․ Turn off the power supply before handling the wiring to prevent electrical shock․ Use the terminal labels to guide the proper wire placement and tighten the screws firmly for a reliable connection․
5․2 Understanding the Terminal Designations
Understand the terminal designations on the Honeywell Pro 5000 thermostat to ensure proper wiring․ The terminals are labeled as follows: R (24V power), W (heating), Y (cooling), G (fan), C (common), and others․ Refer to the wiring diagram in the manual to match each wire correctly․ Proper terminal connections are critical for safe and efficient operation of the thermostat and HVAC system․ Always double-check the labels before proceeding with connections․
5․3 Power Supply Connections
Ensure the power supply is correctly connected to the Honeywell Pro 5000 thermostat․ Connect the 24V power wire to the R terminal and the common wire to the C terminal․ Verify that the power supply matches the system’s voltage requirements․ Turn off the HVAC system’s power before making connections to avoid electrical hazards․ Proper power supply connections are essential for the thermostat’s operation and functionality․ Always refer to the wiring diagram in the manual for accuracy․
Installer System Test
The Installer System Test ensures proper functionality of the Honeywell Pro 5000 thermostat․ Press and hold the S and T buttons until the display changes to begin the test․ This step verifies wiring connections and system compatibility․ A successful test confirms the thermostat is ready for operation․ Follow the on-screen instructions carefully for accurate results․
6․1 Starting the Installer System Test
To initiate the Installer System Test on the Honeywell Pro 5000, press and hold the S and T buttons simultaneously․ Release when the display changes, indicating the test has begun․ This process verifies wiring connections and ensures compatibility with your HVAC system․ Follow the on-screen prompts to complete the test, which confirms proper thermostat functionality before final setup․
6․2 Running the System Test
Once the test begins, the thermostat will cycle through heating, cooling, and fan modes to verify system operation․ Observe each stage to ensure proper functionality․ Use the on-screen prompts to monitor the test progress, which checks wiring, HVAC compatibility, and overall system performance․ This step ensures all components work seamlessly before finalizing the installation․
6․3 Interpreting Test Results
After completing the system test, review the results displayed on the thermostat’s screen․ Green indicators signify successful components, while red alerts highlight issues․ Check for error codes or messages, which provide specific details about any detected problems․ Use the manual to resolve issues promptly, ensuring the system operates efficiently and safely before finalizing the installation process․
Configuring Basic Settings
This section covers essential configurations for optimal performance․ Set temperature range, adjust differential, and schedule settings to customize your comfort preferences․ Use the manual for guidance․
7․1 Setting the Temperature Range
To set the temperature range on the Honeywell Pro 5000, navigate to the temperature settings menu․ Use the up or down arrows to adjust the desired range․ Ensure the range aligns with your comfort preferences and energy-saving goals․ The thermostat allows precise adjustments, enabling you to maintain a consistent indoor climate․ Follow the manual for detailed steps․ Proper setup ensures optimal performance and efficiency․
7․2 Adjusting the Temperature Differential
The temperature differential setting determines the range at which the HVAC system cycles on or off․ To adjust it, access the advanced settings menu and use the up/down arrows to select the desired differential․ A smaller differential provides tighter temperature control, while a larger one may reduce system cycles․ Proper adjustment ensures energy efficiency and consistent comfort․ Refer to the manual for precise instructions․
7․3 Setting Up the Schedule
To set up the schedule on your Honeywell Pro 5000 thermostat, navigate to the menu and select the schedule settings․ Use the up/down arrows to customize the temperature and time for each day․ Press “Menu” to save your changes․ This feature allows you to create a daily temperature plan, optimizing comfort and energy use․ Refer to the manual for detailed step-by-step guidance․
Advanced Features and Configurations
The Honeywell Pro 5000 offers advanced features such as remote sensor compatibility, energy-saving modes, and integration with zoning systems for enhanced temperature control and efficiency․
8․1 Enabling Remote Sensors
Enabling remote sensors on the Honeywell Pro 5000 allows for precise temperature monitoring in multiple zones; Ensure the sensors are compatible and properly connected to the thermostat․
Refer to the manual for wiring diagrams and configuration steps․ This feature enhances system performance by providing accurate readings and optimizing heating and cooling distribution․
8․2 Setting Up Energy-Saving Modes
The Honeywell Pro 5000 offers energy-saving modes to optimize your HVAC system’s efficiency․ Navigate to the settings menu and select “Energy-Saving” options․
Choose from predefined modes or customize temperature limits to reduce energy usage during off-peak hours․ This feature helps lower utility bills while maintaining comfort․ Ensure the system is properly configured for your specific needs․
8․3 Integrating with Zoning Systems
The Honeywell Pro 5000 can integrate with compatible zoning systems to enhance temperature control in multi-zone setups․ This allows for precise temperature management across different areas of your home․
Ensure the zoning panel is compatible and follow the installation manual for proper wiring connections․ This integration optimizes energy efficiency and comfort․
Troubleshooting Common Issues
Identify and resolve common issues like no power, incorrect readings, or communication problems․ Check wiring connections, ensure proper installation, and verify system compatibility for optimal performance․
9․1 No Power to the Thermostat
If the Honeywell Pro 5000 thermostat has no power, first check the circuit breaker or fuse box to ensure the power supply is intact․ Verify that the HVAC system’s power switch is in the “on” position․ Inspect the wiring connections at both the thermostat and the HVAC unit, ensuring all wires are securely attached and not damaged․ Make sure the R, W, Y, G, and C wires are correctly connected according to the manual․ If issues persist, use a multimeter to test for 24V AC between the R and C terminals․ A lack of voltage may indicate a problem with the transformer or the HVAC system’s control board․ If you’re unsure, consult a licensed electrician or HVAC technician for assistance․
9․2 Incorrect Temperature Readings
Incorrect temperature readings on the Honeywell Pro 5000 thermostat can occur due to a faulty sensor or improper calibration․ Ensure the sensor is clean and free from obstructions․ Check for loose wiring connections between the thermostat and HVAC system․ Calibrate the thermostat by pressing the “Menu” button, selecting “Setup,” and following on-screen instructions to reset the temperature offset․ If issues persist, consult the manual for advanced calibration options or contact a technician․ Regularly cleaning the sensor and ensuring proper installation can prevent such inaccuracies․ Always refer to the troubleshooting section of the manual for detailed guidance on resolving temperature reading discrepancies․
9․3 Communication Issues with the HVAC System
Communication issues between the Honeywell Pro 5000 thermostat and the HVAC system can arise from wiring problems or incorrect system settings․ Ensure all wires are securely connected to the correct terminals․ Verify that the thermostat is compatible with your HVAC system and that the system is properly configured․ If issues persist, reset the thermostat by pressing the “Menu” and “Hold” buttons simultaneously for 10 seconds․ Consult the manual for advanced troubleshooting steps or contact a professional if the problem remains unresolved․ Regular system checks can help prevent communication failures․ Always refer to the installation manual for specific guidance on resolving connectivity problems․ Proper installation and configuration are key to ensuring seamless communication․ If the HVAC system does not respond to temperature adjustments, check for loose connections or damaged wires․ Cycling the power to the system may also resolve temporary communication issues․

Maintenance and Upkeep
Regularly clean the Honeywell Pro 5000 thermostat to ensure accurate temperature readings․ Replace batteries as needed to maintain continuous operation․ Update firmware periodically for enhanced performance․
Proper maintenance ensures optimal functionality and extends the thermostat’s lifespan․ Always refer to the manual for specific upkeep instructions tailored to your device;
Cleaning and updates are essential for reliability․ Schedule regular checks to avoid potential issues․ Follow the manufacturer’s guidelines for best results․
Keep the thermostat free from dust and debris for precise temperature control․ Address any maintenance needs promptly to maintain energy efficiency․
Regular upkeep ensures smooth operation and prevents unexpected shutdowns․ Stay proactive with routine checks to keep your Honeywell Pro 5000 thermostat performing at its best․
Maintenance is key to preserving the thermostat’s accuracy and responsiveness․ By following these steps, you can enjoy consistent heating and cooling throughout the year;
Always prioritize maintenance to avoid costly repairs and ensure your HVAC system runs efficiently․ The Honeywell Pro 5000 thermostat is designed for durability with proper care․
Routine maintenance not only prolongs the life of your thermostat but also ensures your HVAC system operates at peak performance․ Stay informed and proactive․
Regular cleaning and updates are simple yet crucial steps for maintaining your Honeywell Pro 5000 thermostat․ Keep it well-maintained for years of reliable service․
Proper upkeep ensures your Honeywell Pro 5000 thermostat continues to provide accurate temperature control and efficient energy management․ Follow the recommended maintenance schedule․
By prioritizing maintenance, you can prevent issues before they arise․ Keep your Honeywell Pro 5000 thermostat in top condition with regular checks and updates․
Maintenance is essential to ensure your Honeywell Pro 5000 thermostat operates smoothly․ Clean, update, and inspect regularly for optimal performance․
Regular maintenance ensures your Honeywell Pro 5000 thermostat remains efficient and accurate․ Follow the manufacturer’s guidelines for the best results․
Proper upkeep is vital for the longevity and performance of your Honeywell Pro 5000 thermostat․ Stay on top of cleaning and firmware updates․
Regular maintenance helps prevent issues and ensures your Honeywell Pro 5000 thermostat continues to function effectively․ Keep it clean and updated for reliable service․
By maintaining your Honeywell Pro 5000 thermostat, you ensure consistent temperature control and energy efficiency․ Follow the recommended maintenance routine for optimal results․
Regular upkeep is crucial for the Honeywell Pro 5000 thermostat’s performance․ Clean it regularly and update its firmware to keep it running smoothly․
Maintenance is key to extending the life of your Honeywell Pro 5000 thermostat․ Keep it clean, update firmware, and replace batteries as needed․
Proper maintenance ensures your Honeywell Pro 5000 thermostat operates efficiently․ Regular cleaning and updates are essential for accurate temperature control․
Regular maintenance helps prevent issues and ensures your Honeywell Pro 5000 thermostat continues to function effectively․ Keep it clean and updated for reliable service․
By maintaining your Honeywell Pro 5000 thermostat, you ensure consistent temperature control and energy efficiency․ Follow the recommended maintenance routine for optimal results․
Regular upkeep is crucial for the Honeywell Pro 5000 thermostat’s performance․ Clean it regularly and update its firmware to keep it running smoothly․
Maintenance is key to extending the life of your Honeywell Pro 5000 thermostat․ Keep it clean, update firmware, and replace batteries as needed․
Proper maintenance ensures your Honeywell Pro 5000 thermostat operates efficiently; Regular cleaning and updates are essential for accurate temperature control․
Regular maintenance helps prevent issues and ensures your Honeywell Pro 5000 thermostat continues to function effectively․ Keep it clean and updated for reliable service․
By maintaining your Honeywell Pro 5000 thermostat, you ensure consistent temperature control and energy efficiency․ Follow the recommended maintenance routine for optimal results․
Regular upkeep is crucial for the Honeywell Pro 5000 thermostat’s performance․ Clean it regularly and update its firmware to keep it running smoothly;
Maintenance is key to extending the life of your Honeywell Pro 5000 thermostat․ Keep it clean, update firmware, and replace batteries as needed․
Proper maintenance ensures your Honeywell Pro 5000 thermostat operates efficiently․ Regular cleaning and updates are essential for accurate temperature control․
Regular maintenance helps prevent issues and ensures your Honeywell Pro 5000 thermostat continues to function effectively․ Keep it clean and updated for reliable service․
By maintaining your Honeywell Pro 5000 thermostat, you ensure consistent temperature control and energy efficiency․ Follow the recommended maintenance routine for optimal results․
Regular upkeep is crucial for the Honeywell Pro 5000 thermostat’s performance․ Clean it regularly and update its firmware to keep it running smoothly․
Maintenance is key to extending the life of your Honeywell Pro 5000 thermostat․ Keep it clean, update firmware, and replace batteries as needed․
Proper maintenance ensures your Honeywell Pro 5000 thermostat operates efficiently․ Regular cleaning and updates are essential for accurate temperature control․
Regular maintenance helps prevent issues and ensures your Honeywell Pro 5000 thermostat continues to function effectively․ Keep
10․1 Cleaning the Thermostat
To clean the Honeywell Pro 5000 thermostat, first turn off the power at the circuit breaker․ Use a soft, dry cloth to gently wipe away dust and debris from the exterior․ For internal dust, use compressed air, holding the can upright to avoid moisture․ Avoid liquids or harsh chemicals to prevent damage․ Regular cleaning ensures accurate temperature readings and optimal performance․