
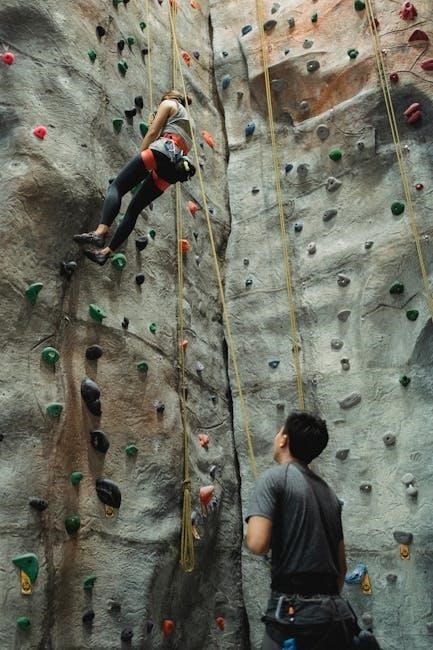
The Step 2 Big Climber with Slide is a durable‚ kid-friendly playset designed for active play․ It features a sturdy climbing wall and an exciting slide‚ promoting physical activity and imaginative fun for children․ Easy to assemble and built to last‚ this climber is perfect for backyard adventures‚ encouraging strength and coordination in little ones while providing endless entertainment․
1․1 Overview of the Product
The Step 2 Big Climber with Slide is a versatile and durable playset designed for toddlers‚ offering a combination of climbing and sliding fun․ Made from high-quality materials‚ it features a sturdy climbing wall with handholds and a smooth slide for safe descents․ The product is designed to promote physical activity‚ coordination‚ and imaginative play while ensuring safety․ With easy-to-follow assembly instructions‚ this climber is perfect for backyard or indoor use‚ providing hours of entertainment for children aged 2 to 6 years․ It is lightweight yet robust‚ making it a great addition to any play area․
1․2 Importance of Proper Assembly
Proper assembly of the Step 2 Big Climber with Slide is essential to ensure the product’s safety‚ stability‚ and durability․ Incorrect assembly can lead to structural weaknesses‚ posing hazards to children․ By following the instructions carefully‚ you can prevent potential risks and ensure all parts function as intended․ Proper assembly also guarantees the product meets weight limits and safety standards‚ providing a secure environment for kids to play․ Taking the time to assemble it correctly ensures years of safe and enjoyable use while maintaining the product’s integrity and performance․

Safety Precautions Before Assembly
Wear protective gloves and eyewear to prevent injuries from sharp edges or tools․ Ensure the work area is clear of distractions and tripping hazards․ Keep children away during assembly to avoid accidents․ Double-check all parts are included and undamaged; Follow the manual closely and avoid using power tools near children․ Be mindful of heavy components and lift safely to prevent strain․ Ensure proper ventilation if using adhesives or chemicals․ Stay focused and avoid distractions while assembling․ Keep loose clothing tied back to avoid entanglement with tools․ Ensure all tools are in good condition to prevent malfunction․ Avoid over-tightening screws to prevent damage to parts․ Be cautious of sharp edges on metal or plastic components․ Keep a first-aid kit nearby in case of minor injuries․ Stay hydrated and take breaks if assembly is physically demanding․ Ensure all parts are aligned correctly before tightening to avoid misassembly․ Use a stable and flat surface for assembly to prevent parts from tipping․ Keep all packaging materials away from children to avoid choking hazards․ Be patient and methodical to ensure a safe and correct assembly process․ Do not rush through critical steps to maintain safety and quality․ Use a ladder or step stool safely if needed‚ and always maintain three points of contact․ Ensure good lighting in the workspace to see small parts clearly․ Keep pets away to prevent distractions or interference․ Stay organized with tools and parts to avoid losing or misplacing items․ Be aware of your surroundings to prevent accidents․ Take your time and enjoy the process of creating a safe play structure for your child․
2․1 General Safety Guidelines
Always wear safety goggles and gloves to protect yourself from potential hazards․ Ensure the workspace is well-ventilated and free from clutter․ Keep children and pets away while assembling to avoid distractions․ Use tools correctly and avoid over-tightening parts․ Handle sharp edges with care to prevent injuries․ Double-check each step in the manual to ensure accuracy․ Never leave tools unattended or within reach of children․ Keep all packaging materials away from kids to avoid choking hazards․ Stay focused and work at a steady pace to maintain safety․ Ensure proper lighting to clearly see small components․ Be mindful of heavy parts and lift with caution to prevent strain․ Follow all manufacturer instructions for tools and materials․ Keep a first-aid kit nearby in case of minor accidents․ Stay organized to avoid losing or misplacing parts․ Take regular breaks if needed to maintain concentration and safety․
2․2 Recommended Age and Weight Limits
The Step 2 Big Climber with Slide is designed for children aged 2 to 8 years old․ The maximum weight limit for the climber is 300 pounds‚ ensuring safe use for multiple children․ Adult supervision is recommended for younger children to ensure their safety․ Exceeding the weight limit can compromise the structure’s stability․ Always adhere to these guidelines to prevent accidents and ensure the product’s longevity․ Children under 2 years should not use the climber without additional support․ Weight distribution should be balanced to maintain even stability․ Follow these limits to provide a safe and enjoyable experience for your kids․
Tools and Materials Required
Essential tools: screwdriver‚ Allen wrench‚ and rubber mallet․ Materials: all hardware provided in the package․ Ensure you have these ready for assembly․
3․1 List of Tools Needed
To assemble the Step 2 Big Climber with Slide‚ you’ll need specific tools to ensure a smooth process․ Start with a screwdriver (both Phillips and flathead)‚ an Allen wrench for securing bolts‚ and a rubber mallet to tighten parts without damaging them․ A measuring tape can help verify alignments‚ while clamps may assist in holding pieces steady․ For heavier tasks‚ a socket wrench or adjustable wrench is useful․ A level ensures the structure is even‚ and a drill might be needed for unexpected adjustments․ Gather these tools beforehand to avoid delays during assembly․ Organization is key for efficiency․
3․2 Essential Materials for Assembly
The Step 2 Big Climber with Slide requires specific materials for a successful assembly․ These include the base frame‚ climbing wall panels‚ slide sections‚ and canopy components․ Additional materials like screws‚ bolts‚ and Allen bolts are provided for securing parts together․ Ensure all packaging is opened carefully to avoid damaging components․ Small items such as locking pegs‚ rubber caps‚ and climbing holds must be accounted for․ Organize materials by category to streamline the process․ Double-check the inventory against the instruction manual to confirm no parts are missing before starting․ Proper organization ensures a smooth and efficient assembly experience․

Preparing the Workspace
Choose a spacious‚ flat area for assembly․ Ensure the floor is clear of obstacles and cover it with a protective sheet․ Gather tools and materials nearby․
4․1 Choosing the Right Location
Select a spacious‚ flat area with enough room to accommodate the climber and slide․ Ensure the surface is even and free from obstructions․ Avoid areas near walls or windows to prevent accidents․ Choose a location with durable flooring or place a mat underneath for added safety․ Ideally‚ the area should be close to where the climber will be used to avoid moving the assembled structure․ Proper lighting is essential for visibility during assembly․ Ensure the space is well-ventilated and free from distractions․ A suitable location ensures a smooth assembly process and safe usage․
4․2 Clearing and Organizing the Area
Before starting assembly‚ thoroughly clear the workspace of clutter‚ toys‚ and breakable items․ Remove any obstructions to ensure easy movement and prevent accidents․ Cover the floor with a protective mat or sheet to safeguard against scratches or damage․ Organize all tools and materials within easy reach to streamline the process․ Keep children and pets away during assembly to maintain focus and safety․ Ensure the area is well-lit to avoid mistakes․ A tidy and organized workspace promotes efficiency and reduces the risk of errors during assembly․ This step is crucial for a smooth and stress-free experience․

Assembling the Base Frame
Begin by unpacking and identifying all base frame components․ Attach the legs and supports securely‚ ensuring proper alignment․ Tighten all bolts firmly using an Allen wrench to create a stable foundation․
5․1 Unpacking and Identifying Components
Start by carefully unpacking all parts from the boxes․ Lay them out on a flat surface and cross-reference with the inventory list to ensure nothing is missing․ Identify the base frame pieces‚ legs‚ support brackets‚ and hardware․ Separate the screws‚ bolts‚ and washers into labeled containers for easy access․ Familiarize yourself with each component’s name and purpose using the provided manual․ Organize the parts in a logical order to streamline the assembly process․ Double-check for any damage or missing items before proceeding․ This step ensures a smooth and efficient assembly experience․
5․2 Attaching the Legs and Supports
Begin by attaching the legs to the base frame using the provided bolts and washers․ Ensure the legs are aligned with the pre-drilled holes and securely tightened with an Allen wrench․ Next‚ attach the support brackets to the frame and legs for added stability․ Use the screws to fasten them firmly․ Refer to the manual for precise alignment to avoid unevenness․ Double-check all connections to ensure they are tight and sturdy․ This step is crucial for the overall stability of the climber‚ so take your time to ensure everything is properly secured․

Building the Climbing Wall
Construct the wall panels by attaching climbing holds using screws․ Ensure holds are evenly spaced for safe climbing․ Follow the manual for precise alignment and secure tightening․
6․1 Constructing the Wall Panels
Begin by laying out the wall panels on a flat surface․ Align the panels according to the manufacturer’s instructions․ If pre-drilled holes are present‚ use them to guide the placement of the climbing holds․ If not‚ carefully mark the positions for the holds based on the recommended spacing to ensure even distribution and safe climbing․ Use a screwdriver to attach the holds securely‚ tightening them firmly to prevent loosening over time․ Double-check the alignment and stability of each hold by gently tugging on them․ Once all holds are in place‚ ensure the panels are properly connected to the base frame using the provided brackets or connectors․ Finally‚ perform a thorough inspection to verify that all components are securely fastened and the wall is stable․ This step is crucial for ensuring the safety and durability of the climbing wall․
6․2 Securing the Climbing Holds
To secure the climbing holds‚ start by ensuring they are properly aligned with the pre-drilled holes on the wall panels․ Insert the holds into the holes and tighten them using the provided screws or bolts․ Use an Allen wrench or screwdriver to ensure they are tightly fastened․ Check each hold by gently tugging on it to confirm it is securely attached․ Avoid overtightening‚ as this could damage the material․ Once all holds are in place‚ inspect the climbing wall to ensure even spacing and stability․ This step ensures the holds remain firmly in place during use‚ providing a safe and durable climbing surface for children․

Installing the Slide
Align the slide with the base frame‚ ensuring it fits securely․ Use the provided brackets or screws to fasten it tightly․ Check for stability․
7․1 Aligning the Slide with the Frame
To align the slide with the frame‚ start by identifying the pre-drilled holes or alignment marks on both the slide and the base․ Carefully place the slide onto the frame‚ ensuring it is centered and evenly spaced․ Use a level tool to verify the slide is straight and properly positioned․ If the slide has tabs or brackets‚ align them with the corresponding slots on the frame․ Double-check the alignment to ensure the slide sits flush against the base without any gaps or tilting․ This step is crucial for proper installation and safety․
7․2 Fixing the Slide in Place
Once the slide is properly aligned‚ secure it to the frame using the provided bolts or screws․ Tighten these fasteners evenly to ensure the slide remains stable and flush with the base․ Use a wrench or screwdriver to tighten firmly‚ but avoid overtightening‚ which could damage the material․ Double-check that all screws are tightened evenly to maintain balance․ For added security‚ ensure the slide’s brackets or tabs are fully engaged with the frame’s attachment points․ Finally‚ test the slide by gently rocking it to confirm it is sturdy and securely fastened in place․
Attaching the Canopy
Place the canopy halves onto the frame‚ aligning the locking pegs with pre-drilled holes․ Secure them using the provided bolts‚ ensuring a tight‚ watertight seal․ Tighten evenly for stability․
8․1 Placing the Canopy Locking Pegs
Begin by locating the pre-drilled holes on the canopy frame․ Insert the locking pegs into these holes‚ ensuring they fit snugly without forcing․ Align the pegs with the canopy’s notches for proper placement․ Gently push the pegs until they click securely into position․ Make sure the canopy is evenly balanced and aligned with the frame․ Double-check the alignment to ensure stability and prevent any shifting․ If the pegs feel loose‚ adjust their position slightly until they fit firmly․ This step ensures the canopy attaches correctly for a sturdy and secure fit․ Refer to the manual for precise peg locations․ Always verify alignment before proceeding․
8․2 Securing the Canopy Halves Together
To secure the canopy halves‚ align them evenly at the midline․ Use the provided connectors or screws to bring the two sections together․ Tighten the screws firmly‚ ensuring no gaps remain․ Check the alignment to maintain structural integrity․ Make sure the canopy sits level and balanced on the frame․ If the halves don’t align perfectly‚ adjust slightly and re-tighten․ For added stability‚ ensure all connectors are snug and evenly spaced․ Once secure‚ test the canopy by gently rocking it to confirm it holds firmly in place․ Proper alignment ensures safety and prevents any shifting during use․ Always refer to the manual for specific fastening instructions․
Final Assembly Checks
Inspect all connections and components for tightness and alignment․ Ensure the structure is stable‚ safe‚ and level․ Verify all parts are securely attached and functional․
9․1 Ensuring All Parts Are Secure
Double-check every bolt‚ screw‚ and connection to confirm they are tightly fastened․ Ensure all joints are stable and align properly․ Pay special attention to high-stress areas like the base frame‚ climbing holds‚ and slide attachments․ Use a wrench or screwdriver to verify that no parts are loose․ Make sure all safety features‚ such as the canopy locking pegs‚ are securely in place․ If any component feels unstable‚ tighten it immediately․ A thorough inspection ensures the climber’s durability and safety for years of play․
9․2 Testing the Stability and Safety
After assembly‚ perform a thorough stability test by gently rocking the structure to ensure it doesn’t wobble or tip․ Check the slide for smooth operation and proper alignment with the base; Test the climbing holds to confirm they are securely attached and can withstand weight․ Inspect the canopy for proper alignment and sturdiness․ Ensure all edges are smooth and free from sharp protrusions․ Finally‚ have an adult test the climber by applying weight to critical areas to confirm its safety and stability before allowing children to play․

Maintenance and Care Tips
Regularly clean the climber with mild soap and water․ Inspect for wear and tear‚ tightening any loose screws․ Store in a dry place to prevent rust․ Lubricate moving parts annually for smooth operation․ Avoid abrasive cleaners to maintain the finish․ Check for damaged components and replace them promptly to ensure safety and longevity․
10․1 Cleaning the Climber and Slide
Use mild soap and warm water to clean the climber and slide regularly․ Avoid harsh chemicals or abrasive materials that could damage the surfaces․ Scrub all areas with a soft cloth or sponge‚ paying attention to high-touch zones․ Rinse thoroughly to remove soap residue․ Dry the climber and slide with a clean towel to prevent water spots․ For plastic parts‚ a gentle disinfectant can be used to maintain hygiene․ Regular cleaning ensures durability and keeps the equipment safe for children to use․ Avoid power washing‚ as it may damage the structure or finish․
10․2 Regular Inspection for Wear and Tear
Regularly inspect the Step 2 Big Climber with Slide for signs of wear and tear․ Check for cracks‚ loose screws‚ or damage to climbing holds and slide surfaces․ Inspect joints and connections to ensure they remain tight and secure․ Look for fading or peeling of the finish that may expose raw materials․ Address any issues promptly to prevent further damage․ Perform inspections monthly or after heavy use․ Replace worn or damaged parts immediately to maintain safety and functionality․ Regular checks help extend the lifespan of the climber and slide‚ ensuring safe and enjoyable play for children․

Troubleshooting Common Issues
Troubleshoot issues like wobbly frames or loose parts․ Ensure all bolts are tightened and connections are secure․ Consult the manual for alignment guidance․ Address problems promptly․
11․1 Addressing Wobbly Parts
If the climber feels unstable‚ check for loose screws or uneven surfaces․ Tighten all bolts and ensure the base is on a level surface․ If wobbling persists‚ verify that all frame connections are secure and properly aligned; Refer to the instruction manual for specific tightening sequences․ Using a level tool can help confirm the structure’s balance․ If the issue remains‚ double-check that no parts were missed during assembly․ Stability is crucial for safety‚ so address any wobbling promptly to prevent accidents during use․
11․2 Fixing Loose Screws or Joints
If screws or joints become loose during or after assembly‚ tighten them immediately using the provided Allen wrench or screwdriver․ Ensure all connections are snug but avoid over-tightening‚ which could strip the threads; For persistent looseness‚ apply a small amount of silicone-based lubricant or tighten in a star pattern for even distribution․ Regularly inspect high-stress areas like the slide and climbing wall joints․ If instability continues‚ refer to the manual for torque specifications or contact customer support for assistance․ Properly secured joints ensure long-term durability and safety for children using the climber․
Completing the Step 2 Big Climber assembly ensures a safe‚ durable playset․ Regular maintenance and inspections guarantee years of enjoyment for your children․
12․1 Summary of Assembly Process
Assembling the Step 2 Big Climber involves systematically following instructions to ensure safety and durability․ Begin by preparing your workspace and gathering tools․ Unpack and identify components‚ then build the base frame by attaching legs and supports․ Construct the climbing wall‚ secure holds‚ and align the slide for proper installation․ Attach the canopy and ensure all parts are tightly secured․ Conduct final checks for stability and safety․ Regular maintenance‚ like cleaning and inspecting for wear‚ will extend the lifespan of the playset․ By following these steps‚ you create a sturdy‚ enjoyable climber for your children․
12․2 Enjoying the Step 2 Big Climber with Slide
Once assembled‚ the Step 2 Big Climber with Slide offers endless fun for kids․ Encourage imaginative play‚ physical activity‚ and skill development through climbing‚ sliding‚ and exploring․ The sturdy design ensures safety while fostering confidence and coordination․ Adults can supervise or join in‚ creating memorable moments with their children․ Regular use promotes healthy growth and entertainment‚ making it a valuable addition to any backyard or play area․ With proper care‚ this climber will provide years of enjoyment for your little ones․