
Removing a manual window crank is straightforward with a simple method․ Use a cloth to pull the spring clip, requiring no special tools․ This easy process suits all skill levels․
Understanding the Components
Manual window cranks consist of a handle attached to a spindle, which connects to a window regulator․ The spindle is secured by a spring clip, a small metal part fitting into a groove․ This clip holds the handle firmly, ensuring smooth operation․ The door panel covers the mechanism, and removing it provides access․ The crank’s components are designed for durability, but wear can occur over time․ Understanding these parts is essential for successful removal and maintenance․ Proper handling of the spring clip is crucial to avoid damage or loss․ Familiarity with these elements ensures the process is done safely and effectively, preventing unnecessary complications during or after removal․
Purpose of Removal
Removing a manual window crank is often necessary for maintenance, repair, or replacement․ Over time, the mechanism may wear out, causing difficulty in rolling the window up or down․ By taking out the crank, you can access the internal components, such as the spindle and spring clip, to inspect for damage or corrosion․ This process allows for cleaning, lubricating, or replacing parts to restore smooth operation․ Additionally, removal is essential when upgrading to a power window system or addressing issues like a loose handle․ Proper removal ensures that any underlying problems are addressed efficiently, preventing further damage and ensuring the window functions correctly․ Regular maintenance can extend the lifespan of the window mechanism, saving time and money in the long run․

Preparing for Removal
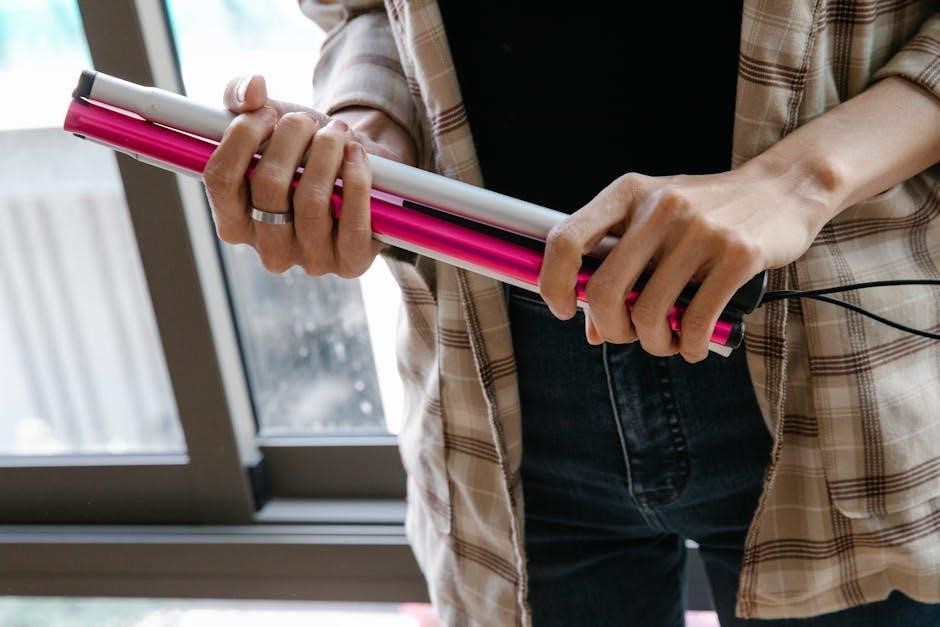
Preparing for removal involves gathering essential tools and accessing the window mechanism․ Ensure you have a screwdriver and rag to safely dislodge the spring clip without damage․
Gathering Tools
To remove a manual window crank, you’ll need a few basic tools․ A flathead screwdriver is essential for dislodging the spring clip․ Additionally, a rag or cloth is useful for safely pulling the clip without causing it to fly away․ Some people also find pliers helpful for extra grip, though they’re not always necessary․ Ensure your tools are readily accessible to streamline the process․ Having the right tools on hand will make the removal smoother and prevent potential damage to the mechanism․ This simple setup ensures you’re prepared for the task without needing specialized equipment․ Gather these items before starting to avoid delays and work efficiently․
Accessing the Mechanism
Accessing the window crank mechanism requires careful preparation․ Start by locating the spring clip that secures the crank handle to the spindle․ Use a flathead screwdriver to gently dislodge the clip from its groove․ Once the clip is loosened, slide a rag or cloth behind the crank to catch the clip as it releases․ Be cautious, as the clip may fly out unexpectedly․ With the clip removed, you can pull the crank handle straight off, exposing the spindle and associated components․ This step is crucial for gaining access to the internal mechanism, allowing you to inspect or replace parts as needed; Ensure the area is clear to avoid losing the small spring clip during removal․

Removing the Spring Clip
Locate the spring clip on the spindle․ Use a flathead screwdriver to gently pry it loose․ Alternatively, slide a rag behind the crank and pull it in a sawing motion to dislodge the clip․ Be cautious, as it may fly out․ Ensure the area is clear to prevent losing the clip․
Using a Screwdriver
To remove the spring clip using a screwdriver, start by locating the small gap where the clip sits on the spindle․ Insert a flathead screwdriver into this gap, ensuring it fits snugly behind the clip․ Gently pry the screwdriver back and forth while applying light pressure downward․ This motion will help dislodge the clip from its seated position․ Be careful not to apply too much force, as this could damage the spindle or surrounding components․ Once the clip begins to loosen, continue wiggling it until it comes free․ If the clip is stubborn, you may need to adjust the screwdriver’s angle for better leverage․ Always wear gloves to protect your hands from sharp edges․ This method is effective and requires minimal tools, making it a practical solution for most situations․
Employing a Rag
Using a rag is a simple and effective method to remove the spring clip․ Slide the rag behind the window crank, positioning it so the fabric catches the clip’s edges․ With a gentle sawing motion, move the rag back and forth while pulling it away from the crank․ This action will dislodge the clip without requiring tools․ Be cautious, as the clip may fly out when released․ The rag prevents the clip from getting lost and avoids potential damage to the surrounding area․ This method is ideal for those who prefer not to use tools, ensuring a safe and straightforward removal process․ It’s a quick solution that works well in most situations, making it a popular choice for DIY enthusiasts․

Detaching the Crank

After removing the spring clip, gently pull the crank handle away from the spindle․ Ensure the clip doesn’t fly off and get lost during this process․
Removing the Handle
To remove the handle, start by dislodging the spring clip that secures it to the spindle․ Use a rag to slide behind the crank, catching the clip’s edges․ With a gentle sawing motion, pull the rag back and forth while applying light pressure․ This will loosen the clip’s grip․ Once the clip is dislodged, carefully pull the handle away from the spindle․ Be cautious, as the clip may fly off unexpectedly․ If it does, retrieve it to avoid losing it․ After removing the handle, inspect the spindle for any remaining parts of the clip․ This step is crucial for ensuring a smooth reassembly process later․ By following these steps, you can safely detach the handle without causing damage to the mechanism;

Post-Removal Steps
After removing the crank, inspect the spindle for any remaining debris or clips․ Consider replacing worn parts to ensure smooth operation when reassembling the mechanism later․
Inspecting the Spindle
After removing the crank, carefully examine the spindle for any remaining debris or clips․ Ensure the area is clean and free from obstructions․ Check for wear or damage on the spindle’s surface, as this can affect the reinstallation of the crank or the overall window mechanism․ If you find any residue from the spring clip, gently remove it with a soft cloth or a small brush to prevent interference․ Inspecting the spindle ensures a smooth reassembly process and maintains the proper function of the window crank․ This step is crucial for avoiding future issues with the window’s operation․
Considering Replacement
After removing the crank, assess whether replacement is necessary․ Inspect the spindle and surrounding mechanism for wear or damage․ If the spring clip is damaged or the crank shows signs of excessive wear, consider replacing these components․ A worn-out crank or faulty spindle can lead to poor window operation․ When replacing, ensure the new crank is compatible with your vehicle’s make and model․ Proper fit and alignment are crucial for smooth functionality․ If unsure, consult a professional or refer to your vehicle’s manual․ Replacement is a proactive step to maintain the efficiency and longevity of your car’s window mechanism․ Addressing these issues early prevents further damage and ensures reliable performance․

Common Mistakes to Avoid
- Using excessive force can damage the spindle or surrounding components․
- Improper alignment when reattaching the crank may lead to poor functionality․
Using Excessive Force
Using excessive force when removing a manual window crank can lead to unnecessary damage․ Avoid applying too much pressure, as this may bend the spindle or harm nearby components․ The spring clip is designed to release with minimal effort, so aggressive pulling or prying can cause it to fly off unpredictably․ Additionally, using tools like hammers or pliers forcefully can scratch or break the crank handle or door panel․ Instead, focus on gentle, controlled movements to dislodge the clip․ A soft cloth can help prevent slippage while maintaining control․ Remember, patience is key to avoiding costly repairs or replacements․ Always handle the mechanism with care to ensure a smooth and damage-free removal process․
Improper Alignment

Improper alignment during the removal process can lead to complications․ If the cloth or tool used to dislodge the spring clip is not properly positioned, it may cause the clip to slip or misalign․ This can result in the clip flying off in an unpredictable direction, potentially causing damage to the surrounding area or getting lost․ Additionally, misaligning the crank handle during removal can strain the spindle or door panel, leading to unnecessary wear or even breakage․ To avoid this, ensure the cloth or tool is correctly aligned with the clip before applying pressure․ Always maintain a firm, steady grip on the crank handle to prevent accidental movement․ Proper alignment is crucial for a smooth and damage-free removal process․ Be cautious and deliberate in your actions to avoid such issues․
Reassembly and Final Checks
After removal, reattach the door panel securely․ Test the window crank mechanism to ensure smooth operation․ Verify all components are properly aligned and functioning correctly;
Reattaching the Door Panel
After removing the window crank, reattach the door panel by aligning it properly with the door frame․ Ensure all clips and screws are securely fastened․ Gently push the panel into place, making sure it fits snugly without gaps․ Tighten the screws firmly but avoid overtightening, which could damage the panel or the door․ Once the panel is back in position, test the window crank mechanism to ensure it operates smoothly․ If the panel feels loose or the mechanism doesn’t function correctly, check the alignment and tighten any loose screws․ For added safety, have someone assist you to hold the panel in place while reattaching it․ This step is crucial for maintaining the integrity of your car’s door and window system․ Always ensure the panel is properly secured to avoid any issues later․ If unsure, consult your car’s manual or seek professional help․
Testing the Mechanism
After reattaching the door panel, test the window crank mechanism to ensure it operates smoothly․ Turn the crank both clockwise and counterclockwise to verify proper movement․ Check if the window rolls up and down effortlessly․ Inspect the spring clip to ensure it is securely in place and not loose․ If the mechanism feels stiff or uneven, adjust the alignment of the crank or the spindle․ Proper testing ensures the window functions correctly and prevents future issues․ If the crank slips or the window doesn’t move smoothly, re-examine the spring clip and spindle connection․ Testing is crucial to confirm the repair’s success and maintain the window’s functionality․ Always ensure the mechanism is tested thoroughly before finalizing the repair․
Removing a manual window crank is a simple process using a cloth to dislodge the spring clip․ This method ensures easy removal without special tools, suitable for all skill levels․
Removing a manual window crank involves a straightforward process that requires minimal tools․ Start by accessing the mechanism behind the door panel․ Use a cloth to slide behind the crank, catching the spring clip with a sawing motion․ This dislodges the clip, allowing the handle to be pulled off․ Ensure careful handling to avoid losing the clip․ After removal, inspect the spindle for damage or debris․ Consider replacing the crank if necessary․ Reassembly involves reattaching the door panel and testing the mechanism․ This method is efficient and suitable for all skill levels, ensuring a damage-free removal process․ Proper alignment and avoiding excessive force are key to a successful outcome․

Final Tips
When removing a manual window crank, always handle the spring clip with care to prevent it from flying away and getting lost․ Use a rag to safely dislodge the clip, ensuring it doesn’t damage the spindle․ After removal, inspect the area for any debris or wear․ If reattaching the crank, align it properly to avoid misplacement․ Test the mechanism post-removal to ensure smooth operation․ For reassembly, secure the clip firmly to maintain stability․ If unsure, consider consulting a professional or referencing a repair manual․ Keep all parts organized to avoid losing small components․ This method is efficient and damage-free, making it ideal for DIY enthusiasts․ Proper technique ensures a successful outcome every time․