
Cross stitch is a popular, relaxing hobby offering a creative outlet and artistic expression. It’s perfect for beginners, requiring minimal supplies and patience. This craft allows you to create beautiful designs, fostering calm and accomplishment. With its portability and versatility, cross stitch is an excellent activity for all skill levels, making it a rewarding pastime for those new to needlework.
What is Cross Stitch?
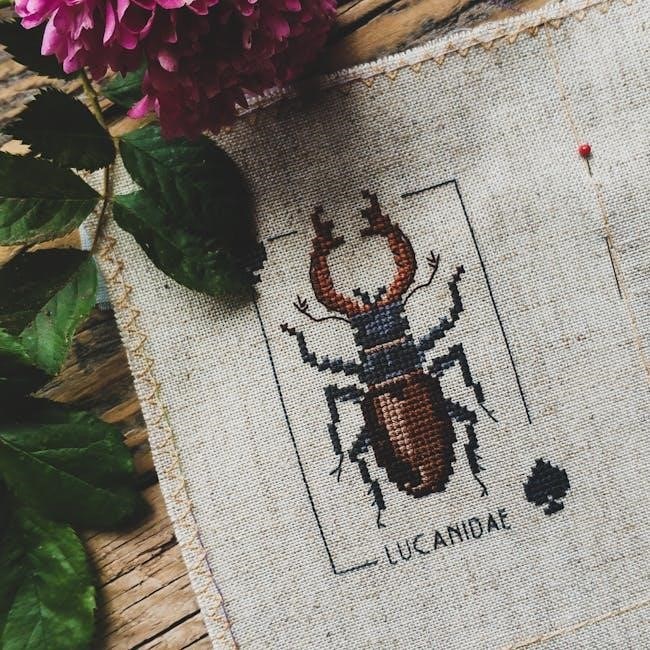
Cross stitch is a traditional needlework technique creating images on fabric using X-shaped stitches. It involves stitching on evenly woven fabric, following patterns or charts. This craft is versatile, allowing for custom designs on various materials, from clothing to home decor. It’s a meditative activity that combines creativity with precision, making it accessible to beginners while offering depth for experienced stitchers.
Why Cross Stitch is Perfect for Beginners
Cross stitch is an ideal hobby for beginners due to its simplicity and forgiving nature. It requires minimal supplies, making it accessible to everyone. The repetitive stitching motion is calming and therapeutic, while the creative process fosters a sense of accomplishment. Its portability allows stitching anywhere, and the step-by-step patterns make it easy to follow, even for those new to needlework.

Materials Needed for Cross Stitch
The essential supplies include cross stitch fabric, embroidery floss, a tapestry needle, scissors, and a hoop or frame. These basics are easy to find and affordable.
Essential Tools and Supplies
The primary tools needed for cross stitch include embroidery floss, a tapestry needle, scissors, and a stitching hoop or frame. Additional supplies like a floss organizer and stitch markers can enhance your stitching experience. These tools are readily available and essential for creating neat, consistent stitches. They provide the foundation for a smooth and enjoyable stitching process.
Choosing the Right Fabric
Selecting the right fabric is crucial for cross stitch. Popular choices include Aida cloth, Evenweave linen, and jobelan. Aida cloth is ideal for beginners due to its clear, even weave. Evenweave linen offers a more traditional feel, while jobelan combines softness with durability. Consider the project size and your preference for stiffness or flexibility when choosing fabric. Proper fabric selection ensures a smooth stitching experience.
Understanding Cross Stitch Charts
Cross stitch charts are visual guides using symbols and colors to represent stitches and threads. They help stitchers follow patterns accurately, making projects manageable and enjoyable for beginners.
How to Read a Cross Stitch Pattern
Start by identifying symbols and colors on the chart, each representing specific stitches or threads. Use the legend as a reference guide. Count squares to align stitches accurately, ensuring even spacing. Locate the center of the design for a starting point. Follow rows systematically, matching symbols to thread colors. Practice patience and consistency to master pattern interpretation effectively.
Key Symbols and Abbreviations
Key symbols and abbreviations are essential for understanding cross stitch patterns. Common symbols include ‘X’ for full cross stitches and ‘/’ for half stitches. Abbreviations like ‘st’ for stitch and ‘h’ for half stitch simplify instructions. Always refer to the pattern’s legend for specific symbol meanings, ensuring accurate stitching. Consistency in symbols helps maintain clarity across different designs.
Preparing Your Fabric
Preparing your fabric is crucial for a smooth cross stitching experience. Start by ironing the fabric to remove wrinkles, ensuring it lies flat. Find the fabric’s center by folding it in half both vertically and horizontally, creasing it gently to mark the midpoint. Use a hoop or frame to keep the fabric taut, maintaining even tension for consistent stitches. Trim excess fabric neatly, considering zigzag scissors to prevent fraying. If needed, draw or use pre-printed grid lines to guide your stitching. Wash and dry the fabric beforehand to prevent shrinkage or color bleeding. Choose the right fabric type, such as Aida cloth for beginners, and ensure it’s large enough for your design. Keep the fabric in the hoop or frame throughout your project to maintain shape and ease of access. Finally, work in a well-lit area to enhance visibility and comfort while stitching.
Finding the Center of Your Fabric
Finding the center of your fabric is essential for starting your cross stitch project symmetrically. Fold the fabric in half vertically, then horizontally, and lightly crease to mark the center point. Use this crease to align your pattern or grid. For accuracy, measure the fabric’s dimensions and calculate the midpoint, ensuring your stitches start evenly. This step ensures your design is centered and balanced.
Stretching and Securing the Fabric
Stretching and securing your fabric ensures even stitching and prevents distortion. Use a hoop or embroidery frame to keep the fabric taut. Start by tightening the fabric evenly, beginning from the center and working outward. Avoid over-tightening, as this can cause wrinkles or misalignment. Secure the edges with clips or tape to maintain stability, ensuring a smooth surface for stitching.

Basic Cross Stitch Stitches
Cross stitch involves simple, repetitive stitches that form the foundation of all designs. The primary stitch is the full cross, while half and quarter stitches add detail. Mastering these basic stitches ensures consistency and quality in your work, making them essential for beginners to learn and practice.
The Full Cross Stitch
The full cross stitch is the foundation of cross stitch, consisting of two diagonal stitches forming an “X.” To create it, bring your needle up through the fabric, insert it diagonally down to the right, and then repeat in the opposite direction. This stitch is essential for beginners, as it forms the basis of most designs. Keeping the fabric taut and the thread taut ensures even, consistent stitches. Mastering this stitch is crucial for achieving professional-looking results and building confidence in your stitching abilities.
Half Stitches and Quarter Stitches
Half stitches and quarter stitches add detail and texture to your designs. A half stitch is a single diagonal line, while a quarter stitch is a smaller mark within a square. They are used to create subtle shading and intricate patterns. To stitch them, follow the pattern’s guidance, ensuring your needle goes in the correct direction. Keep your tension even and align these stitches carefully with the grid to maintain consistency and clarity in your work.

Tips for Improving Stitch Quality
Maintain consistent tension to ensure even stitches. Use the right needle size and keep fabric taut. This helps achieve neat, uniform results and prevents fabric distortion.
Maintaining Tension and Even Stitches
Maintaining consistent tension is key to achieving even, professional-looking stitches. Use a hoop or frame to keep fabric taut, ensuring stitches lie flat. Avoid pulling thread too tightly, as this can distort the fabric. Keep your needle at a comfortable angle and stitch gently but firmly. Regularly check your work to ensure even spacing and adjust tension as needed for uniform results.

Managing Thread and Preventing Tangles
To manage thread effectively, cut it into shorter lengths to minimize tangles. Gently hold the thread without twisting or pulling too tightly. Use a thread conditioner or wax to reduce friction and prevent knots. Keep your workspace organized, laying threads flat or using small containers for different colors. Avoid wrapping threads around your fingers, as this can cause twists. Using the right needle size and maintaining a consistent stitching pattern also helps prevent tangles. By handling thread with care and using these simple techniques, you can keep your stitching sessions smooth and enjoyable.
Common Mistakes to Avoid
Beginners often make errors like incorrect stitch placement, using the wrong needle size, or not following the pattern. Avoid skipping stitches or pulling thread too tightly, as this can distort the fabric. Keep your workspace well-lit to prevent mistakes and ensure your fabric is properly secured to maintain even tension while stitching.
Incorrect Stitch Placement
Incorrect stitch placement is a common mistake for beginners. Miscounting squares or failing to align stitches properly can lead to design distortions. Always use a hoop or frame to keep fabric taut, and count carefully to ensure accuracy. Regularly check your work against the pattern to catch errors early. For clarity, consider using a magnifying glass or good lighting to consider each stitch placement.
Handling Fabric and Thread Errors
Fabric and thread errors can frustrate beginners. If thread tangles, gently unwind it or cut it close to the fabric. For misplaced stitches, carefully remove them with scissors or a seam ripper. If fabric stretches unevenly, re-stretch and secure it properly. Minor mistakes can often be corrected without redoing the entire project, saving time and reducing frustration for new stitchers.
Starting Your First Project
Begin by selecting a simple pattern and preparing your fabric. Find the center, thread your needle, and start stitching. Use a hoop or frame for stability, ensuring even tension. Take it one stitch at a time, enjoying the process and learning as you go for a successful start.
Choosing the Right Pattern for Beginners

Selecting the right pattern is crucial for a enjoyable start. Look for designs with simple, clear instructions and minimal color changes. Patterns labeled “beginner-friendly” or “quick stitch” are ideal. Ensure the design has a low stitch count and avoids complex stitches. Choose a theme that excites you, like small animals or basic motifs, to keep motivation high. Opt for charts over counted work for easier navigation. Bright, contrasting colors will help you see your stitches clearly. Avoid overly intricate or detailed patterns that might overwhelm you. Start small to build confidence and skills gradually.
Completing Your First Stitch
To complete your first stitch, insert the needle into the fabric at the center point. Wrap the thread around the needle in a figure of 8, then pull it through gently. Keep the fabric taut to ensure even stitches. Guide the needle back through the fabric, forming a straight line; Repeat this process, maintaining consistent tension for uniform stitches. Celebrate your progress as you bring your design to life!
Finishing Touches
Use sharp scissors to carefully trim excess thread close to the fabric. This step ensures a clean and professional finish, enhancing the overall design appearance neatly.
Trimming Excess Thread
Use sharp, dedicated scissors to carefully trim excess thread close to the fabric surface. Hold the fabric taut and snip threads at a slight angle to avoid cutting stitches. This step ensures a neat, professional finish. Trim both top and bottom threads for evenness. Regularly trimming prevents tangles and keeps your work looking clean. Inspect your design for stray threads and trim as needed for a polished appearance.
Washing and Framing Your Work
Gently hand wash your finished cross stitch in cold water with a mild detergent to remove dirt and excess stabilizer. Lay flat to air dry, avoiding direct sunlight. For framing, use a professional framer or a sturdy frame with acid-free backing to preserve your work. Consider adding UV-resistant glass to protect colors. This ensures your cross stitch remains vibrant and well-preserved for years to come.
Cross stitch is a rewarding hobby that combines creativity with relaxation. As you complete projects, you’ll gain confidence and skill, unlocking endless possibilities for artistic expression.
Next Steps in Your Cross Stitch Journey
Congratulations on completing your first project! Now, explore more complex patterns and techniques to refine your skills. Experiment with different fabrics, threads, and stitches to expand your creativity. Join cross stitch communities or forums for inspiration and support. Consider taking on larger projects or designing your own patterns to challenge yourself. Happy stitching!
Encouragement and Final Tips
Remember, cross stitch is a journey of patience and creativity. Don’t be discouraged by mistakes—they’re opportunities to learn. Celebrate small victories and enjoy the process. Keep experimenting with colors, fabrics, and patterns to grow your skills. Join stitching communities for inspiration and support. Most importantly, have fun and be proud of your handmade creations!